Homepage Blank Roof Inspection PDF Form

File Breakdown

Fact Name Details
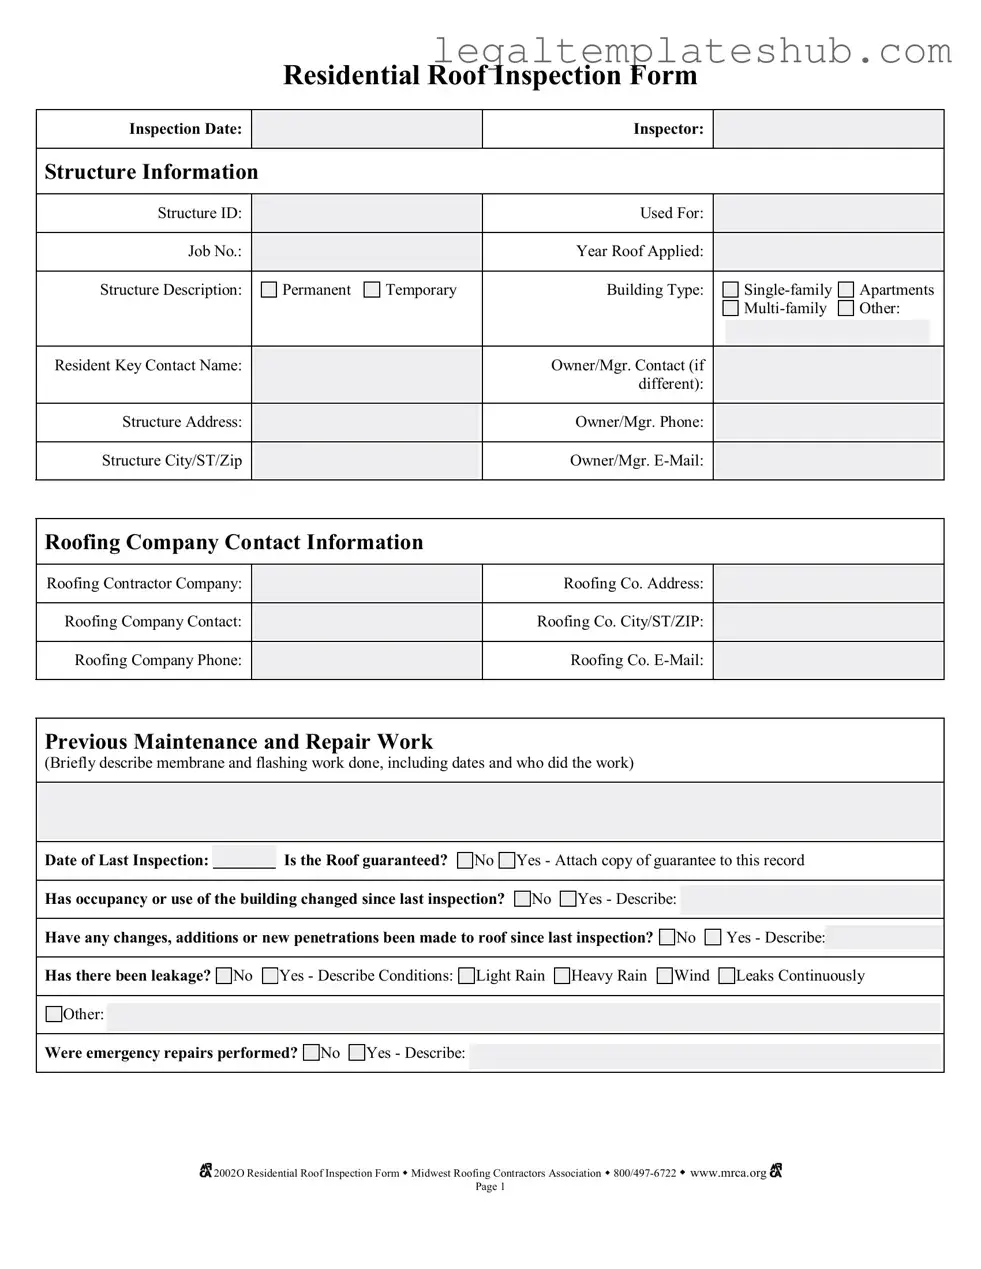
Inspection Date The form requires the date of the roof inspection to be recorded, ensuring a clear timeline for maintenance.
Structure Information Details about the structure, including ID, type, and description, must be filled out to identify the specific roof being inspected.
Roofing Company Contact Contact information for the roofing contractor is essential. This includes the company name, address, and phone number.
Maintenance History Inspectors must note previous maintenance and repair work, including dates and descriptions of work done. This aids in understanding the roof's condition.
Leakage Assessment The form includes a section to indicate whether there has been leakage and to describe the conditions that led to it, such as heavy rain or wind.
Emergency Repairs Inspectors must document any emergency repairs performed, providing insight into the roof's ongoing issues and immediate needs.
Condition Codes Each section of the inspection includes codes (G, F, P) to evaluate the condition of various roof components, guiding necessary actions.

Key takeaways

When filling out the Roof Inspection form, keep these key takeaways in mind:

  • Accurate Information: Ensure all fields, such as inspection date and structure ID, are filled out correctly.
  • Contact Details: Provide complete contact information for the roofing company and owner/manager.
  • Previous Work: Document any past maintenance or repairs clearly, including dates and contractors.
  • Inspection History: Note the date of the last inspection and any changes in occupancy or roof structure.
  • Leakage Documentation: If there have been leaks, describe their conditions and frequency thoroughly.
  • Emergency Repairs: Record any emergency repairs that were made, including the nature of the issues.
  • Condition Codes: Use the provided codes (G, F, P) to assess the condition of various roof components.
  • Photographic Evidence: Include photographs or videos to support your findings and keep them with the inspection record.
  • Grid Marking: Mark all items with the appropriate code on the roof plan grid for clarity.
  • Retention of Records: Maintain copies of the inspection forms and any photographic evidence for future reference.

Dos and Don'ts

When filling out the Roof Inspection form, attention to detail is crucial. Here are some essential do's and don'ts to ensure accuracy and completeness.

  • Do fill in all required fields completely. Missing information can lead to misunderstandings and delays.
  • Do provide clear descriptions of any previous maintenance and repair work. This context helps future inspections.
  • Do attach any guarantees or warranties related to the roof. This documentation is vital for reference.
  • Do note any changes in occupancy or use since the last inspection. Changes can affect the roof's condition.
  • Don't leave sections blank if they are relevant. Incomplete forms can hinder the inspection process.
  • Don't use vague language when describing issues. Specific details help inspectors understand the situation better.
  • Don't forget to include your contact information. This ensures that follow-up questions can be addressed promptly.
  • Don't overlook the importance of documenting any leaks or damage. Accurate records are crucial for future assessments.

Instructions on Filling in Roof Inspection

Completing the Roof Inspection form is a straightforward process that ensures all necessary information is captured accurately. Follow these steps to fill out the form effectively.

  1. Enter the Inspection Date at the top of the form.
  2. Fill in the Inspector name.
  3. Provide the Structure Information:
    • Structure ID
    • Used For
    • Job No.
    • Year Roof Applied
    • Structure Description
    • Indicate if the structure is Permanent or Temporary
    • Select the Building Type: Single-family, Apartments, Multi-family, or Other
  4. Fill in the Resident Key Contact Name and Owner/Mgr. Contact (if different).
  5. Complete the Structure Address and Owner/Mgr. Phone.
  6. Provide the Structure City/ST/Zip and Owner/Mgr. E-Mail.
  7. Enter the Roofing Contractor Company information:
    • Roofing Co. Address
    • Roofing Company Contact
    • Roofing Co. City/ST/ZIP
    • Roofing Company Phone
    • Roofing Co. E-Mail
  8. Describe any Previous Maintenance and Repair Work, including dates and who performed the work.
  9. Indicate the Date of Last Inspection.
  10. Specify if the roof is guaranteed and attach a copy if applicable.
  11. Answer whether the occupancy or use of the building has changed since the last inspection.
  12. Note any changes, additions, or new penetrations made to the roof since the last inspection.
  13. Indicate if there has been any leakage and describe the conditions.
  14. State whether any emergency repairs were performed and describe them.
  15. Assess the condition of various elements of the roof using the provided codes (G, F, P) and mark them on the roof plan grid.
  16. Complete the Photographic Record section, noting any film or digital photography taken.

Once the form is filled out, keep copies for your records. This documentation will serve as a valuable reference for future inspections and maintenance activities.

Misconceptions

  • Misconception 1: The Roof Inspection form is only for new roofs.
  • This form is designed for all types of roofs, regardless of their age. It helps assess the condition of both new and existing roofs, ensuring that maintenance and repairs can be properly documented.

  • Misconception 2: A roof inspection is only necessary when leaks are present.
  • Many homeowners believe that inspections are only needed when there are visible issues. In reality, regular inspections can identify potential problems before they escalate, saving time and money in the long run.

  • Misconception 3: The inspection form is too complicated to fill out.
  • While the form contains various sections, it is structured to guide the inspector through the process. Each section prompts for specific information, making it easier to complete than it may initially appear.

  • Misconception 4: Only professional inspectors can fill out the form.
  • While professionals are certainly qualified to conduct inspections, property owners can also use the form to document their observations. However, it's advisable to consult with a professional for a thorough assessment.

  • Misconception 5: The condition codes are subjective and unreliable.
  • The codes (Good, Fair, Poor) are based on established criteria and industry standards. Inspectors are trained to use these codes consistently, providing a reliable assessment of the roof's condition.

  • Misconception 6: All issues found during an inspection require immediate action.
  • Not every issue noted on the form indicates an urgent problem. Some conditions may only require monitoring, allowing homeowners to prioritize repairs based on severity.

  • Misconception 7: The form is not useful for future reference.
  • In fact, the Roof Inspection form serves as a vital record for future inspections. It helps track changes over time, guiding maintenance decisions and ensuring that previous issues are addressed appropriately.